


One of the most frequently asked questions that we receive in our beginner calligraphy workshops is “How do I write straight when I’m not writing on gridlines?” This is a very good and very important question to ask, especially when you’re just getting started with your calligraphy practice. I’m sharing my favorite tips, tools, and the best (and easiest!) online video for learning to write calligraphy in a straight line.
If you’re wondering how to get your calligraphy straight and looking good, especially when you’re writing on unique and unpredictable pieces like signs, I wrote this just for you. As a seasoned calligraphy pro, we’ve written calligraphy on just about everything from envelopes to ceramic houses to pumpkins, so we have all the advice to help you get your calligraphy straight!
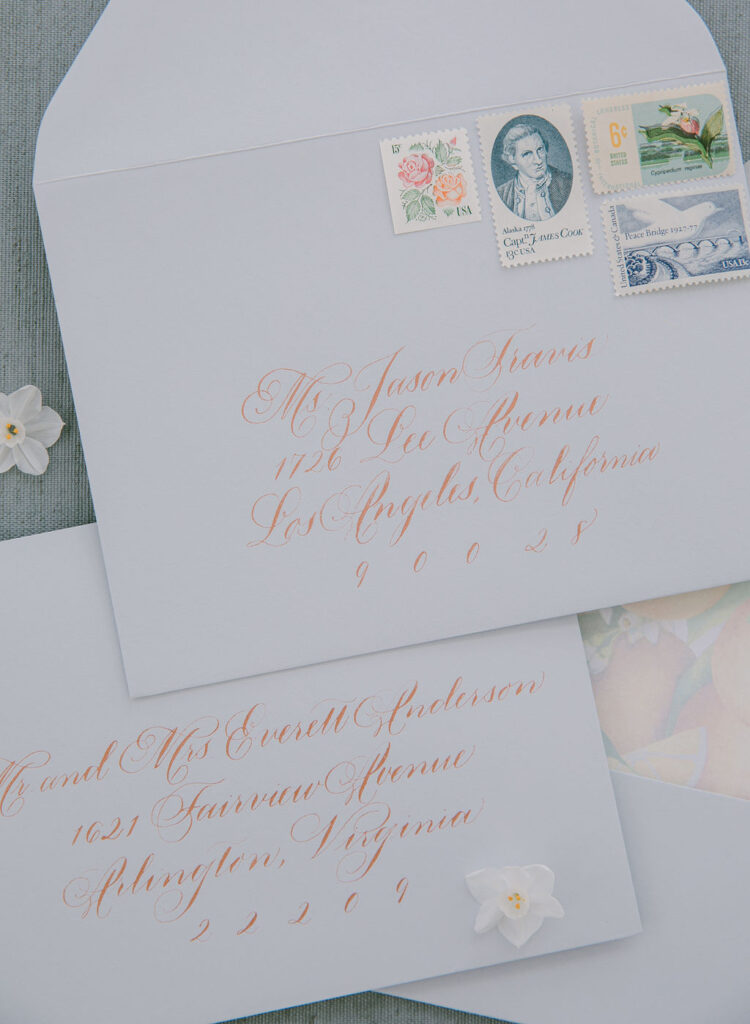
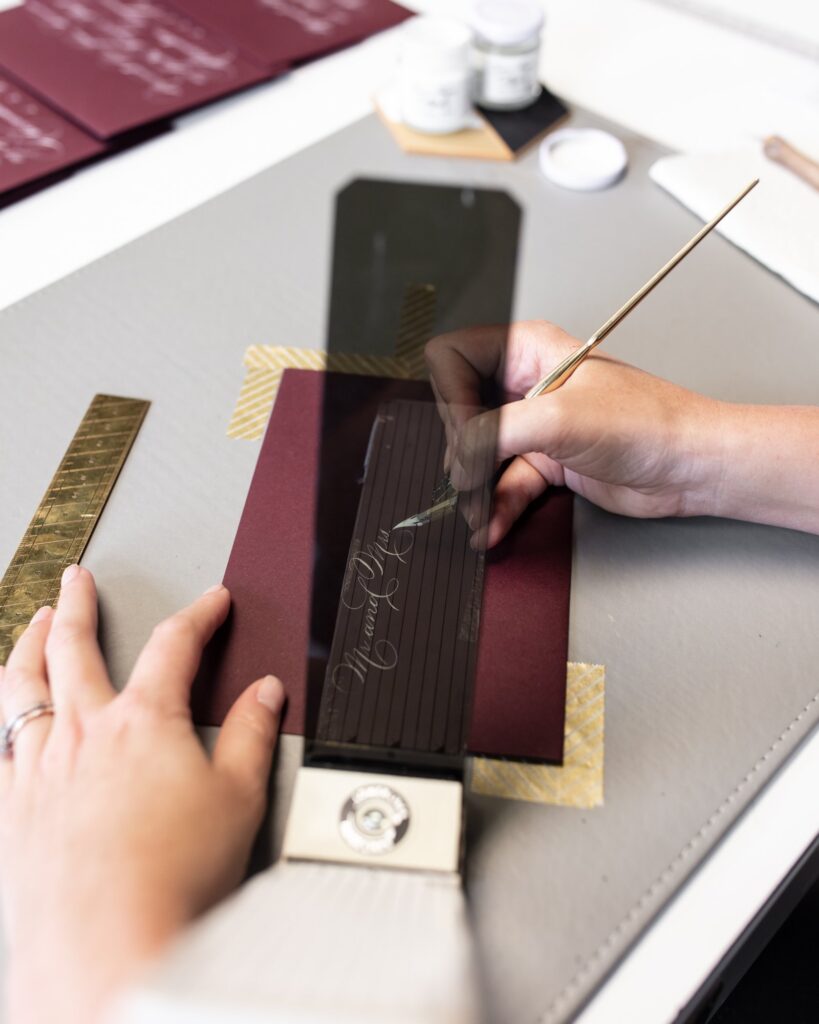 Image by Love Knot Photo
Leveling Up Your Calligraphy Skills
After getting down the basic strokes of calligraphy and learning to write letters, the next skill to tackle is learning to write words and make connections with your letters. From there, the possibilities are endless for how you can apply your calligraphy skills, including writing letters, making signs, addressing envelopes, and more. Whether you are learning calligraphy as a hobby or hoping to turn it into a business, there is one important skill to master once you have gotten the basics down and that is the ability to write calligraphy in a straight line.
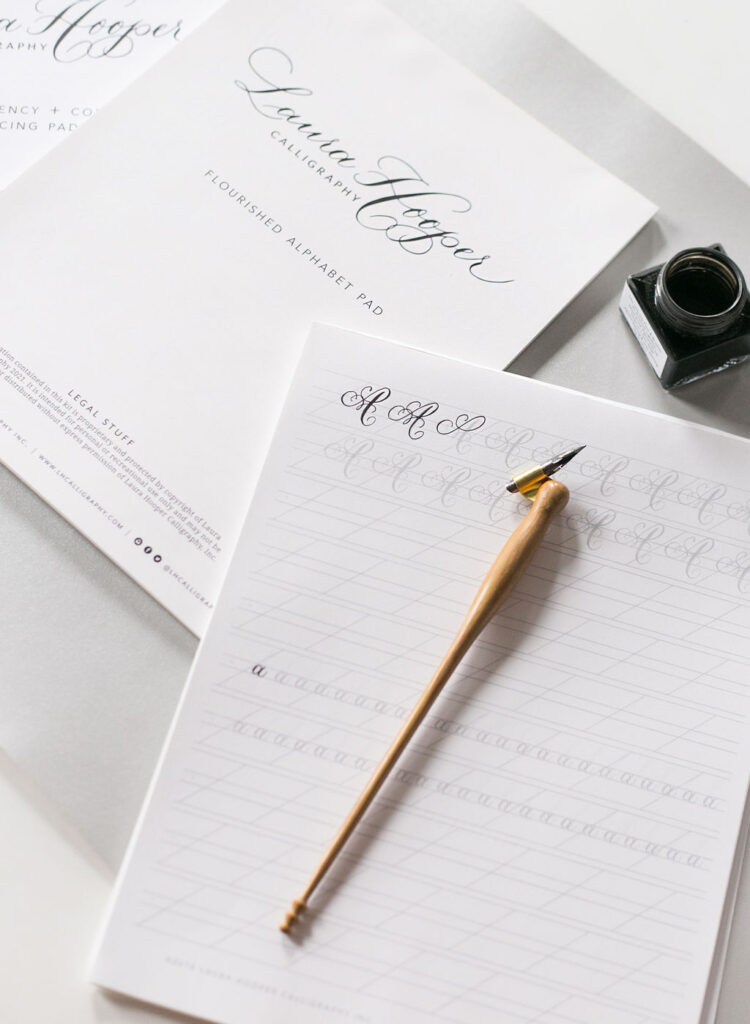
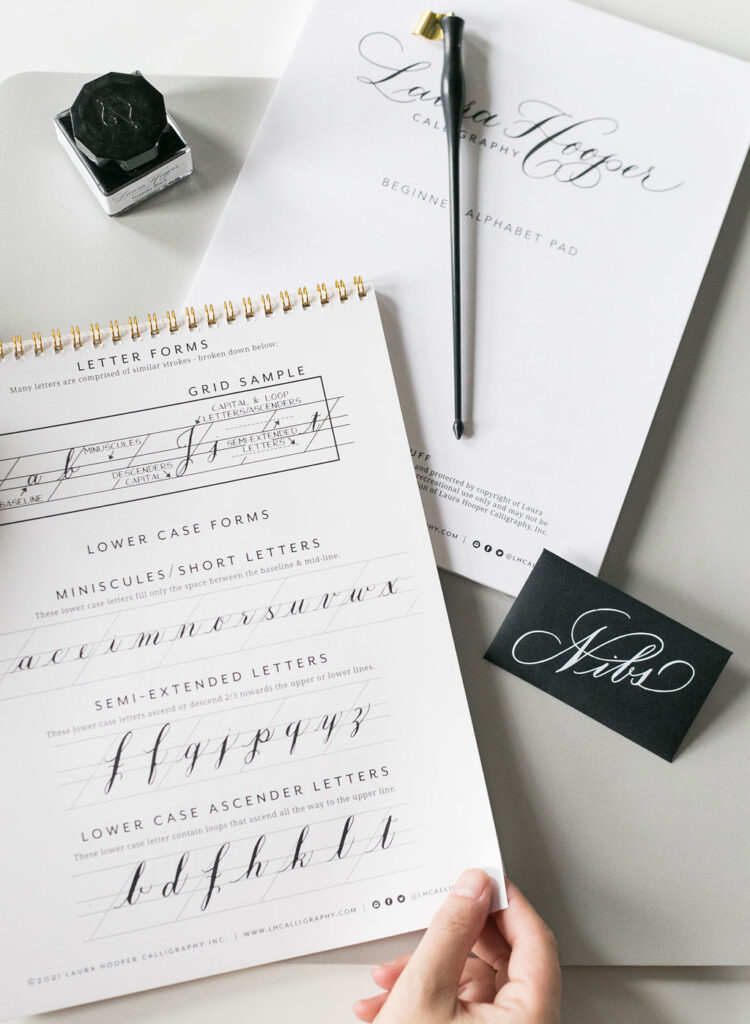
When you are starting out with calligraphy, it is recommended to use calligraphy practice paper with grid lines on it so you can make your letters in the correct proportions. Whether you are practicing directly on the grid paper, or using tracing paper over top of the grid paper, the guidelines will help ensure you are making your letters the correct size and are writing in a straight line.
But when you are ready to move on to real-world projects like calligraphy envelope addressing or calligraphy signage, you will not want those pesky gridlines showing on your final product! There are a few options and tools to help you out when working on envelopes, and these techniques and tools can be applied to other items as well.
Get The Best Straight Line Calligraphy Online Course
What if I told you that in less than one hour you could be well on your way to writing calligraphy in a straight line? Well, it’s true! If you’re struggling with getting your lines straight or you’re looking to get off the practice paper and uplevel your calligraphy, consider taking the best online video tutorial for straight calligraphy lines.
Whether you want to write calligraphy on envelopes, signs, invitations, or just about anything, if you want it to be straight and looking good, this is the help you need! My straight-line calligraphy course walks you through step-by-step the specific methods for writing calligraphy in a straight line. We’ll talk about tools, products, and techniques for writing calligraphy in a straight line.
In the course, I detail the exact techniques and products that I use in my own calligraphy business to get my writing straight. In the end, my hope is that you get a bit of experience with all of the different options so you’re able to decide which techniques and tools are right for you. And, you might decide that you like all of them! Oftentimes I find that different calligraphy situations call for different tools and techniques. So, it is wise for any aspiring calligrapher to have as many options in their back pocket to reference and use as needed.
4 Best Methods for Writing Calligraphy in Straight Lines
If you’re just getting started or you’ve been practicing for a bit, there is no better spot to level up your calligraphy than learning to write in a straight line. When you’re ready to move off of the practice grid paper with the pre-drawn grid lines, here are my four best tips for how to write calligraphy in a straight line.
Remember, if you ever need any help with taking your calligraphy to the next level, be sure to check out my quick and easy online video course for how to write calligraphy in a straight line.
Straight Calligraphy Method # 1: Use a Pencil & Eraser
The first option to help you write calligraphy in a straight line is to simply draw lines with a pencil and a ruler and erase the lines afterward. While this option is financially free, it is not strategically free {nor is it free for your sanity!} as you need to be sure to schedule enough time to draw the lines themselves, but equally as important, time to erase all of your lines.
When going this route and erasing your pencil lines, we recommend waiting a full 12-24 hours for your calligraphy ink to dry to avoid ruining any of your completed calligraphy.
Pro Tip: If you are writing calligraphy on envelopes and you are worried about running out of envelopes, check out our previous post on making sure you have enough envelopes from your clients.
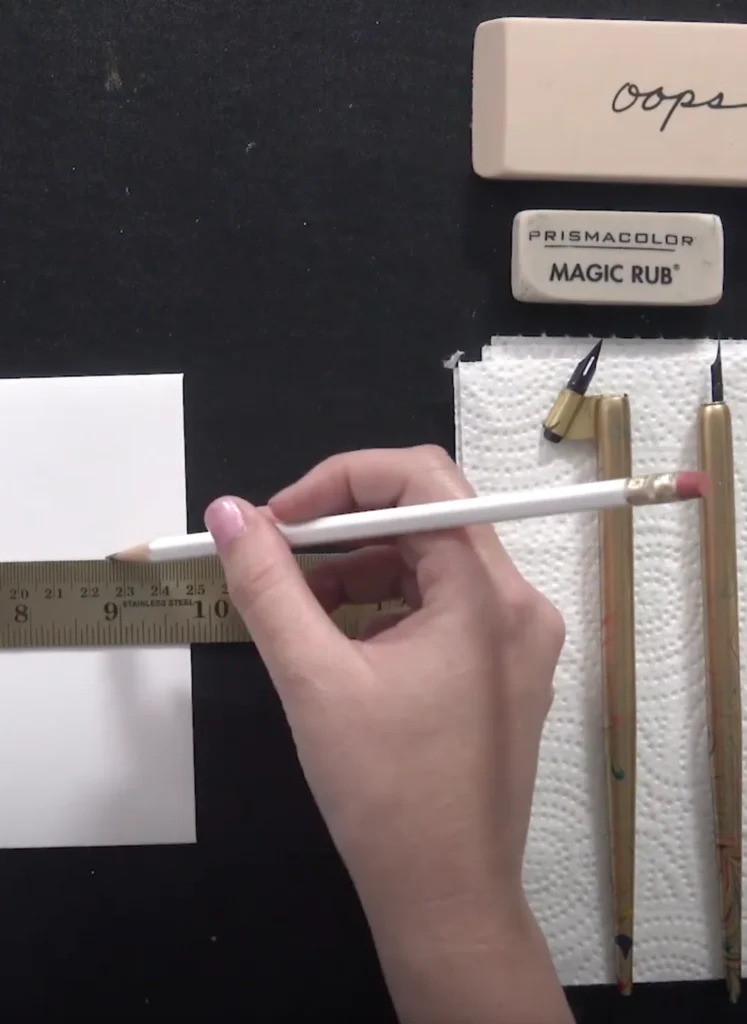
One of the most important things to remember if you choose to use this pencil line and erase method is to take care to not draw your guidelines too dark as you only need a faint guide for yourself.
The next most important thing is to use a quality art eraser to keep your paper intact and your calligraphy unblemished. This is my own personal tried and true favorite art eraser that I use in my calligraphy business. If you’re wondering what the pro’s use, this eraser is it!
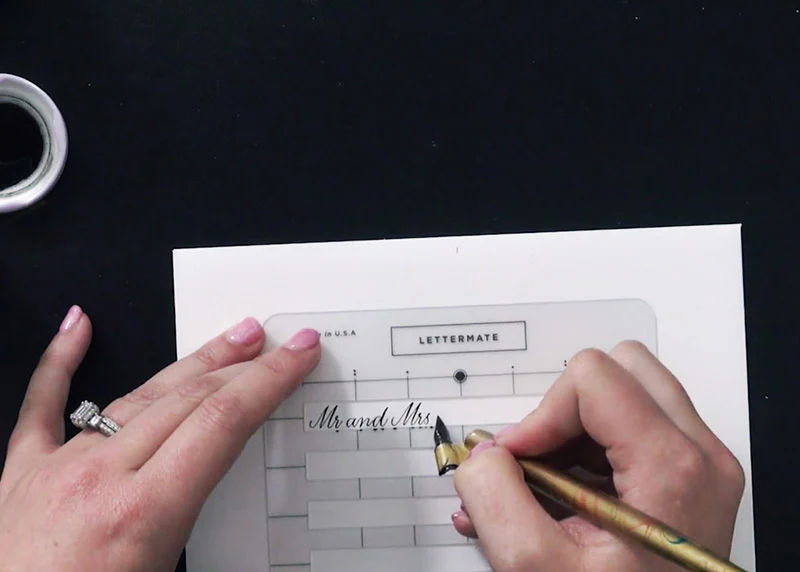
Straight Calligraphy Method #2: Use a Stencil
Another option for helping to write calligraphy in a straight line is to use a calligraphy addressing stencil. Using a calligraphy stencil is a simple option that works well with smaller scripts because your calligraphy will stay in a condensed area within the stencil. With a simple lettering address stencil, your calligraphy writing will be in a straight line your work will be even and look professional. Most stencils have rulers and different sections for writing multiple lines, which can be really helpful when you’re writing calligraphy addresses on envelopes.
Pro Tip: If you are using a calligraphy stencil, just be sure you don’t forget to add your descenders as needed!
If you’re the DIY type, you can also make your own calligraphy stencil template out of cardboard or other materials if you are feeling crafty.
Straight Calligraphy Method #3: Use a Lightbox
The next tool you can use for writing calligraphy in a straight line is a lightbox or a light pad. This is an especially helpful option if you are writing on light-colored envelopes or paper. A lightbox or a simple light pad is very simple to use. Simply put a clean sheet of calligraphy grid lines down first on the light box or pad. Then, put your envelope – or whatever you’re writing calligraphy on – over the gridlines and the light will shine through the papers to reveal the gridlines to assist you in writing your calligraphy in a straight line.
Pro Tip: Keep in mind, that this calligraphy lightbox strategy will not work for dark-colored papers, as the light will not show through to highlight the gridlines on the dark paper.
Calligraphy light pads are a great tool for calligraphers in general as there are so many uses. This is the best calligraphy light pad that the pros use and the one that I recommend to all of my calligraphy students. I often find myself reaching for my calligraphy light box in my own calligraphy work!
Straight Calligraphy Method #4: Use a Laser
Another tool that we like to use that gives a helpful guideline for writing calligraphy in a straight line is a simple laser level. Yes, a portable laser level – like the one that you use to hang pictures in your home. You might even have one in your toolbox right along with your hammer and screwdriver! A laser level can be a very simple and straight forward calligraphy tool in getting your calligraphy lines straight, especially if you are not working on a flat, even, or predictable surface.
To use a level to get your calligraphy lines straight, we recommend taping down the laser level to the tabletop or surface that you’re working on so that it does not move as you are writing calligraphy. This is the best laser level that I have found. It’s so handy dandy that I keep it in my calligraphy tool kit, especially when I’m on-site at an event or wedding doing calligraphy. You just never know what you’re going to need!
Pro Tip: After you tape or secure your laser level in place, we also suggest marking the surface you are working on as to where the envelope or paper you are writing your calligraphy on should go each time. This is especially important if you are writing calligraphy in multiples, like addressing envelopes, so you know that each name and address will end up in the same placement on the envelope. To mark your surface, simply decide where the envelope needs to be for each row of writing and then use tape to mark that place off so you move the envelope rather than the laser for each row of text.
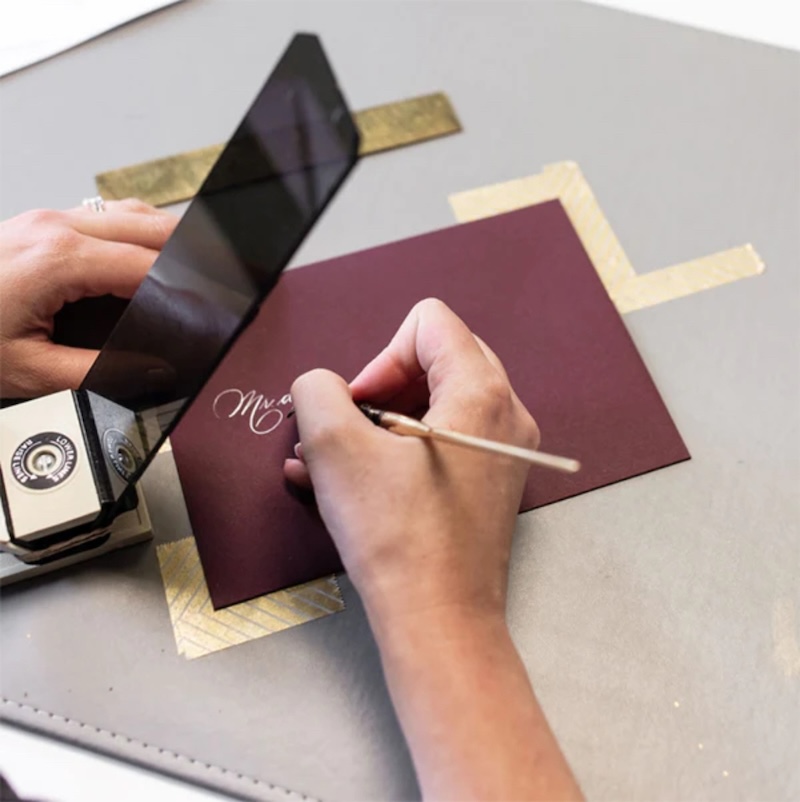
About The Calligraphy Phantom Liner
There is one last calligraphy straight line tool that we’d be remiss we didn’t at least bring up here in our convo about my favorite tools and tips for getting your calligraphy straight. And that is a Phantom Liner.
If you have been practicing calligraphy for a while, perhaps you’ve heard of the Phantom Liner or maybe you even have one from back in the day or a fellow calligraphy lover gifted you one. The reason that we are not recommending the Phantom Liner as a method for getting your calligraphy straight is that the Phantom Liner is no longer being manufactured. But, if you happen to have one in your calligraphy tool kit, or you can find one for sale on eBay, they are a great tool to assist in writing in a straight line once you have a lot of practice with them.
The Phantom Liner is a calligraphy tool that we use regularly in our wedding and event calligraphy business even though it might be considered a bit “old school.” The Phantom Liner is two pieces of plastic, one with lines, and one without, and instead of looking at the envelope you are writing on, you look at the reflection of lines on that envelope. It takes a lot of practice to be able to write calligraphy in a straight line that is not going diagonal, albeit straight, up to the right-hand corner.

Best Tools for Writing Calligraphy in Straight Line
Throughout this post, I’ve given you a few tips for how to write in a straight line when it comes to your calligraphy. I’ve been in the business of calligraphy for many years now and I have tested all the products and tried all the methods – and then some! Lucky for you, I’ve done the research and made all the mistakes so you don’t have to waste your time and money buying useless products that don’t work. All of these tools and products are ones that I have on my desk and use regularly in my calligraphy business.
Here is a quick, handy dandy shopping list of the best tools for writing calligraphy in a straight line:
- Straight line calligraphy online course
- Calligraphy practice paper with grid lines
- The best art eraser
- Laser level
- Lightbox
- Light pad
- Lettering address stencil
So there you have it! We hope that you learned a few things and enjoyed our professional tips and options for writing calligraphy in a straight line as you get going. As you work to take your calligraphy practice to the next level, writing in a straight line will be key and is the perfect next step when you’re ready to level up your skills.
Don’t forget, one of the best things you can do for your calligraphy practice is to take one of our online courses. This will walk you through each skill step by step so you can go at your own pace and rewind as needed. If straight lines are your goal, we offer an online course specific to learning how to write calligraphy in a straight line.
Be sure to check out more of our calligraphy tips and advice to learn more, as well as our shop for the best calligraphy supplies, tools and courses to support you in your calligraphy journey.
Some of the above product links are affiliate-connected and purchasing through these links helps to support the blog.


